
Angel.With.E
Learning Aim A
Research on media devices
Techniques
 |  |  |
|---|---|---|
 |  |  |
 |  |  |
 |  |  |
 |  |
Cutting: J-cut
When the current preceding scene has audio from the following scene
Cutting: Cut-ins
'cutting' from a shot to show a closer element of that same shot
Specialist: Cutaway
A shot/ group of shots that cut to the location to establish the scenes surroundings
Specialist: Graphic match
When the first and second shot contain the same visual elements
Cutting: L-cut
When Audio from a previous scene continues to play within the next scene
Length: Long Takes
a one take shot, continuing for a particularly long time before a cut or transition is used
Cutting: Straight cut
a one take shot, continuing for a particularly long time before a cut or transition is used
Cutting: cross-cutting/parallel editing
used to establish action happening at the current time but in two or more different locations
Purposes

-
To manipulate time within editing to make it appear as if the character or scene has slowed down, the specialist technique slow motion can be used as it alters the tempo of the scene to make it appear as though an aspect of it has slowed down or the entire scene has slowed down. To make a scene or character appear as though a whole day has passed in a few hours, techniques such as elliptical editing or cuts like transitions can be applied to achieve this effect, if transitions are applied such as dissolved it will not only give the desired effect but also look aesthetic to the viewer
-
To make it appear as though there is space within the scene techniques such as split-screen can be applied as it shows more than two separate aspects or a cutaway and cut-ins as it displays aspects of the surroundings of the characters whilst also giving a small break from the narrative
-
To achieve a pace within the production, techniques such as straight cuts or transitions can be applied. Straight cuts are a simple way to make separate shots appear like one shot within a scene. Transitions can be added once the straight cut has been applied, this can range from dissolves, fades, washes and wipe making the scene appear smooth and flawless
-
To create a narrative through motivation, editing techniques such as quick-cuts or cross-cutting can be used as quick-cuts are fast paced which creates energy within the scene, whilst cross-cutting shows the audience two aspects of the video that both happen at the same time, creating anticipation and eagerness within the scene and for the viewers
-
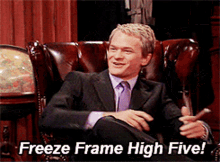
Techniques such as cross-cutting or freeze frames can be applied to create drama by withholding information. Cross-cutting shows two separate actions but at the same time making the audience wonder what the separate action brings towards the main narrative and how it could effect it, freeze frame completely stops the shot at a specific point, this can be used to continue the narrative into the next scene causing the audience to feel curious of what could happen next
-
Embracing continuity can be achieved in editing techniques such as graphic match, as it mandates that the visual elements of the video remain the same. Another technique that can be applied would be match on action as the numerous shots used would all need to maintain the same visual contents but also the audio used would need to match to the actors saying it.
-
To create a sense of suspense within the audience, techniques such as cross-cutting, flash back/forward can be applied. Cross-cutting will present two different actions that are both happening at the same time, making the audience wonder what is happening in one location when they cannot see the other. Flash back/forward shows the viewer a glimpse into either the characters past or the stories future, if the technique is executed within the narrative well it cause suspense and enigma within the story to arise and intrigue the viewers.
-
Techniques such as long takes or reaction shots can be used when trying to create empathy or connection to the character for the audience. Long takes, put more focus on the narrative of the text allowing the audience to see the identity of the characters within text, giving opportunity for them to connect with the character or feel empathetic towards their situation. Reaction shots display a characters reaction to a previous scene, using this technique will show how certain situations evoke emotion or responses from the character, this once again can lead to the viewer to feel empathy or connection to the character

Learning Aim B
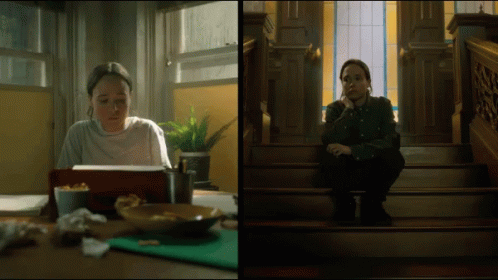
continuity editing example
continuity sequence


Continuity sequence
Development Portfolio
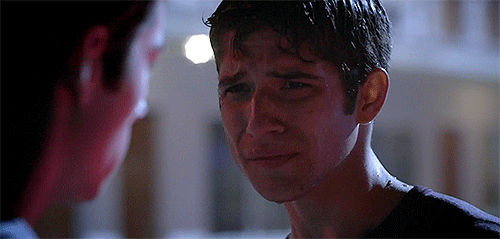
The concept of this video is about two individuals who meet for the first time to go on a date. The two characters, Allister and Georgia have been online friends for a while now and decided recently to meet face to face.
The genre of the video is romance as the overall concept is the meeting between two individuals who have previously been in touch, going out on their first date; which is the typical introduction of most romance genre narratives. I decided to use frames such as mid shots and close-ups as they display the emotions of the characters better whilst also showing their body language. As seen 10 seconds into the video, where a close up is taken of the male lead is smiling at the subject, his NVC portraying confidence but also comfortability in the situation. Close-ups are also a commonly used frame in the romance genre, because of their ability to expose the Characters emotions on screen.
When editing the video, I used cutaways to display the setting in which the scene took place. The cutaways proved useful as they took the audience away from the dialogue for a moment to allow them to digest what happens in previous scenes, whilst still making sense of the current scene. I also used jump cuts when editing the clip. The jump cuts allowed me to keep continuity whilst also switching shots from one another seamlessly, it also kept the narrative flowing between the two characters.
I wanted the audience to understand the storyline of Georgia and Allistar, for this reason, I stuck to using shots such as two shots and over-the-shoulder when dialogue took place. This enabled the audience to see and hear what the characters were discussing throughout the video. To maintain continuity, I manipulated the 180 degrees rule as it ensured that I could still display the narrative and dialogue between Allistar and Georgia whilst also maintaining continuity.
non-continuity editing example
non-continuity sequence


Non-Continuity sequence
Development Portfolio
The concept of this video is about a reality tv show contestant by the name of Georgia who is giving the audience a preview of her talents and personality.
The purpose of the video, was to introduce the new contestant, Georgia, to the audience and make her appear exciting. When filming this video I took inspiration of other reality tv shows such as love Island, when introducing their characters they use non-diegetic sound and transitions to keep the audience's attention and focus on the character.
For this reason I have used a soundtrack within my edit, the soundtrack makes the video more interesting and energetic as it is something the audience can interact with instead of the character just talking to the screen which would be less exciting. The soundtrack is also a way of showing the Characters personality as reality shows commonly use separate soundtracks for each of their contestants. The tone of the sound track i have added is upbeat and whimsical, this connotes to the audience that Georgia ,the contestant, has a bubbly personality.
When editing this video, I applied montage editing. The numerous shots of Georgia facing the camera or completing an action enabled me to show the audience her characteristics and personality, in order to make this more effective; I used the editing technique L-cut. L-cut is when audio from the previous scene follows to the current scene, the L-cut enabled me to show montages of Georgia's character, displaying her to the audience as more likeable and aesthetic, whilst also giving them a narrative from the character themselves. This is commonly done in Reality tv shows character introduction as it is an easy and appealing way to give the audience information whilst also keeping their focus.
My aim when editing this clip was to introduce the character of Georgia to the audience. For this reason, I stuck to using the techniques of montage and L-cut as it enabled the audience to see how the character of Georgia represents themselves and is presented within the introduction visually whilst also giving them an understanding of Georgia's character through her own audible thoughts
Learning Aim C
Planning Documents
Narrative Breakdown
Shooting script
Storyboard
Script


Video Log Sheet
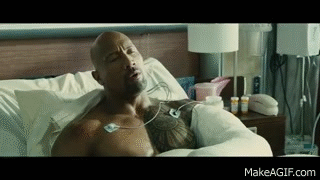
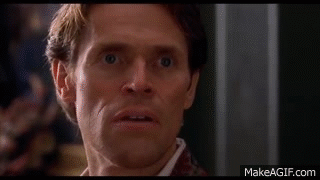
HORROR MOVIE TRAILER
Evaluation
When creating my horror movie trailer I included a character with a mysterious background. This enabled me to create an enigma for the audience, as the character's past explains why they are the way that they are in the current present. To maintain this, I edited flashback scenes in the trailer by saturating certain shots and using a wash transition when the protagonist had a memory of what had occurred.
Within the trailer, the protagonist is seen sitting on a chair with a therapist. However this is not the beginning of the story, I used the method of restrictive narrative to display little information to the audience to add tension to the storyline I was constructing. I added captions whilst editing the trailer as well, the captions allowed me to give information about the story plot and the backstory of the characters.
The captions made it possible for me to display cryptic details instead of showing them to the audience, adding an air of mystery to the story. To ensure the audience read the captions and found them more appealing and memorable, I kept them in the same font throughout the trailer whilst also scaling them to appear as though they were moving when presented. Though simplistic, the technique I used on the captions made them more acceptable to the genre as they appeared ominous and elusive without too many complex transition devices. I also added the media production company at the beginning of the trailer and end credits at the end. This is important within trailers since it gives credibility to the participants and creators of the film and also entices the audience to want to view the movie if they see a famous celebrity is acting in the movie or if the movie was produced by a company that is mainstream within the genre.
Whilst editing, i also used the technique of j and l-cutting during the action scenes to keep the tension whilst also giving character audio. This non-continuity method allowed me to give information to the audience and also show them what the characters were discussing. For example, when the whimpering young man is talking about how people within the town 'aren't normal' i used l-cutting to keep his audio playing whilst i cut to a scene where the protagonist finds a pot with human blood on the stove. I also used the technique of match-on-action during some of the scenes to make them more interesting. I used match on action because it broke from the regular one shot take and brought suspense to the scenes where i needed them. This is best shown through the scene of the door being opened by a hand and then cutting to show it open from the other side. This intrigues the audience as it makes them question what is happening and the importance of the scene. Match-on-action helped to create tension whilst also making the scene look smooth and effortless, maintaining continuity where necessary.
To keep the conventional fast pace established within horror movie trailers, i used quick-cuts and montage editing towards the middle and end of the trailer. As the trailer went on, i used more quick cuts and made scenes shorter and shorter. This guided in establishing the tension and suspense that is conventional of horror trailers, the fast pace grabs the audience's attention and makes them intrigued to watch the movie. The montage editing went hand in hand with the quick-cuts as the most of the shots used did not come one after the other in a linear storytelling sense. Montage editing aided the tension build up which was what i was trying to achieve through the trailer, a build up of tension until the critical point, the jump scare. Montage editing and tension build up are both common used tools within the horror genre, the montages help to build the tension required to gain the audience's attention. I inputted this technique for that exact reason as it is a proven method that works to create tension build up and made my horror movie more conventional to the genre.
I filmed a lot of my shots in the day which is not conventional for horror movies as they commonly are set at night or in morbid settings. To rectify this problem, I used colour saturation to make the scenes appear more ominous and fit the conventions of horror movies. I also used a lot of close-ups and canted angles. The close-ups aided me in presenting the characters who were of importance as close-ups convey significance and intimacy within scenes. The canted angles added variety to the scenes whilst also making them show the mystery required for a horror movie and trailer. These frames made the trailer more effective in its purpose as a horror trailer. Apart from close-ups and canted angles, i used a fair number of over the shoulder shots, two shots and wide angles whilst filming as well. Two shots and wide angles are effective frames for introducing characters and also further expanding the fictional world of the characters. I used two shots and over the shoulder mostly when two characters were conversing or just staring at each other intensely. They aided me in establishing relationships between characters and who the audience should support and should not based on their actions within one scene, complying to the convention of the mandatory hero and villain roles within the horror genre.
My targeted audience was that of an age range of 18-35. For this reason, I contained scenes that included gore and blood whilst also keeping the audience mystified by what was occurring within the story plot. I included the blood and gore as it is conventional to the genre of thriller, my chosen sub genre for my horror movie.To accompany this mystification, I edited the sound of the trailer to sound ominous and eluding. For the sound editing, I included a piano accompaniment as pianos are commonly used instruments for horror movies as they give a variety of desired sounds and sound more thrilling especially when a high key is struck. I also added a series of heartbeats when the characters within the trailer seemed to be afraid or in a situation of adrenaline. These worked very effectively especially towards the end of the trailer when the heartbeats began to slow but get louder, making the jump scare scene more effective in its ominous ending. I paired the heartbeats with a breathing track, that started off with a fast pace and gradually slowed at the end of the trailer. The breathing tracks made the characters sound more afraid of the threat that was presented to them, especially with the heartbeats playing alongside them.
Whilst filming the necessary footage for the horror movie trailer, I had complications. I had access to a few actors and locations for the trailer and fell behind due to this complication. However, I was able to acquire more actors and shoot the required shots for my trailer, I made up the lost time and also included scenery shots for the trailer to expand the world I was creating. Though the complications set me back on time, it also enabled me to see where I needed to make changes so that the trailer would meet the brief given for the task. The altercations I made to the final trailer made it more effective and relevant to the genre.
I asked a few of my peers to watch the trailer and see if it had the intended purpose of a horror movie, I received many positive responses that showed the trailer had actually contained the necessary thrill that horror movies need to capture their audience but lacked an element of fear. To rectify this, I would have added more gore to the montage, showing the killings of the antagonists and why the protagonist and characters were afraid of them. Despite this, they noted that the trailer met its purpose.